
Nextcloud is an extensible collaborative drive tool that can replace traditional office suites and drives. (GSuite and Microsoft 365). The focus is on privacy with a tool that is easily self-hostable.
Crowdsec is a community-based security solution that relies on the principle of log analysis and correlation. All machines running CrowdSec collect intrusion signals, block them, and report them to the rest of the community. Thus, all users benefit from quality protection, and all for free.
Architecture #
Here is how our nextcloud stack is architected
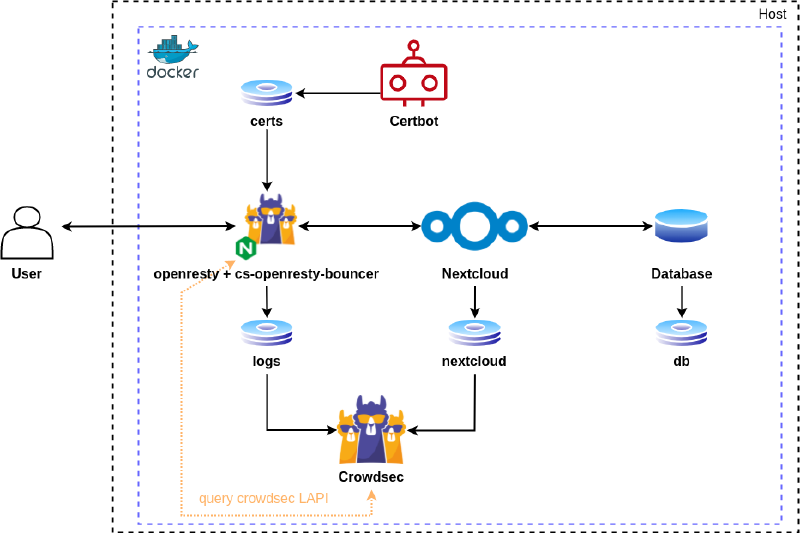
Simplified diagram of the architecture
The CrowdSec container is connected to the logs coming from the reverse proxy as well as the Nextcloud logs. This gives it the ability to detect attacks.
The Openresty container aims to route user requests to the Nextcloud container. It interacts with CrowdSec via the local API and is capable of blocking malicious requests by either banning them or presenting a captcha challenge.
The certbot container allows for the acquisition of free certificates from the Let’s Encrypt service. It also manages the challenge system required for their acquisition.
Finally, the Nextcloud and Database containers ensure the operation of the Nextcloud service.
If you pay attention to the
docker-compose.ymlfile, you will notice two unknown containers (Redis, Cron). Redis is an in-memory database used by Nextcloud for quickly storing information. And Cron is a tool to automate maintenance tasks.
Volumes are also mounted to allow data exchange between containers through the file system.
Prerequisites #
You will also need a reCAPTCHA V2 API key to request from Google’s website. As well as a domain name that already points to your VPS.
In our case, we will use a virtual machine under Debian 11 with the following characteristics:
- 2 GB of RAM
- 100 GB of disk space (to be adjusted according to your use of Nextcloud)
Once our machine is freshly installed, we connect to it via SSH on the root account.
User Creation #
First of all, we create a user bob.
# Create the user
adduser <username> --disabled-password
passwd <username>

# Install sudo
apt-get -y install sudo
Then we grant them permissions.
nano /etc/sudoers
# User privilege specification
root    ALL=(ALL:ALL) ALL
bob     ALL=(ALL:ALL) ALL
Then we switch to our user
su <username>
And finally, we enhance the server SSH security by modifying it to the following configuration.
# Edit sshd config file
sudo nano /etc/ssh/sshd_config

# Force ssh v2
Protocol 2
# Disable root login
PermitRootLogin  no
# Enable ssh logs
SyslogFacility AUTH
LogLevel INFO
# Limit maximum failed authentifications
MaxAuthTries 5
# Limit maximum concurrent sessions
MaxSessions 2
# Disable empty passwords
PermitEmptyPasswords no

sudo systemctl restart sshd.service
Update #
We then update the VM.
sudo apt-get update
sudo apt-get -y dist-upgrade
Then we automate the security update process with the unattended-upgrade package.
sudo apt-get install -y apt-listchanges unattended-upgrades
Firewall #
To protect against external threats, it’s important to close all unnecessary ports on our server. For this task, we dedicate it to iptables and we will administer it with ufw.
Firewall Installation
sudo apt-get install -y iptables iptables-persistent ufw
Once installed, we open the following ports:
- 22 to allow SSH connections
- 80 to allow HTTP connections
- 443 to allow HTTPS connections
Opening ports
sudo ufw allow ssh http https
Now we enable the firewall
sudo ufw enable
Redis #
Redis only requires a small modification of the kernel
sudo sysctl -w vm.overcommit_memory=1
sudo sysctl -p /etc/sysctl.conf
Docker Installation #
With our operating system now up to date, we install docker and docker compose to be able to manage the containers that will run Nextcloud.
# Installing docker-ce
sudo apt-get install -y ca-certificates curl gnupg lsb-release
curl -fsSL https://download.docker.com/linux/debian/gpg | sudo gpg --dearmor -o /usr/share/keyrings/docker-archive-keyring.gpg
echo \
  "deb [arch=$(dpkg --print-architecture) signed-by=/usr/share/keyrings/docker-archive-keyring.gpg] https://download.docker.com/linux/debian \
  $(lsb_release -cs) stable" | sudo tee /etc/apt/sources.list.d/docker.list > /dev/null
sudo apt-get update
sudo apt-get install -y docker-ce docker-ce-cli containerd.io docker-compose-plugin
Starting the Stack #
Before cloning the example repository, we install git.
sudo apt install -y git
We clone the repository containing the configuration files.
git clone https://github.com/GuillaumeASSIER/crowdsec-nextcloud.git
We now need to edit them to match our configuration. Replace all example.org fields with our domain, and add strong passwords to the .env file.
Once all files are created and edited, we launch the deployment of our stack.
sudo docker compose up -d
Adding the Bouncer #
Once the stack has successfully started, we generate a token for our bouncer.
sudo docker exec nextcloud-crowdsec-1 cscli bouncers add openresty-nextcloud
Add the obtained key to the file /crowdsec/crowdsec-openresty-bouncer.conf.yaml
nano /crowdsec/crowdsec-openresty-bouncer.conf.yaml

API_KEY=<token>
Restart the bouncer
sudo docker compose restart openresty
HTTPS Support #
For enhanced security, it is recommended to switch to the HTTPS protocol by adding a domain name as well as a TLS certificate.
Once our stack has started, we can request a certificate with the following command.
Be sure to replace example.com with your domain name
sudo docker compose run --rm certbot certonly --webroot --webroot-path /var/www/certbot/ -d <domain>
Once the certificate is obtained, we edit the .conf/ file by adding these lines at the end of the file.
Be sure to replace example.com with your domain name
server {
  listen 443 ssl http2;
  listen [::]:443 ssl http2;
  server_tokens off;
  proxy_hide_header X-Powered-By;

  client_max_body_size 512M;
  client_body_timeout 300s;
  fastcgi_buffers 64 4K;

  ssl_certificate /etc/nginx/ssl/live/example.com/fullchain.pem;
  ssl_certificate_key /etc/nginx/ssl/live/example.com/privkey.pem;

  access_log /var/log/nginx/access.log;

  ssl_protocols TLSv1.2 TLSv1.3;
  ssl_prefer_server_ciphers off;
  ssl_ciphers ECDHE-ECDSA-AES128-GCM-SHA256:ECDHE-RSA-AES128-GCM-SHA256:ECDHE-ECDSA-AES256-GCM-SHA384:ECDHE-RSA-AES256-GCM-SHA384:ECDHE-ECDSA-CHACHA20-POLY1305:ECDHE-RSA-CHACHA20-POLY1305:DHE-RSA-AES128-GCM-SHA256:DHE-RSA-AES256-GCM-SHA384;

  ssl_session_timeout 1d;
  ssl_session_cache shared:MozSSL:10m;
  ssl_session_tickets off;

  ssl_stapling on;
  ssl_stapling_verify on;

  add_header Strict-Transport-Security "max-age=15552000" always;

  gzip on;
  gzip_vary on;
  gzip_comp_level 4;
  gzip_min_length 256;
  gzip_proxied expired no-cache no-store private no_last_modified no_etag auth;
  gzip_types application/atom+xml application/javascript application/json application/ld+json application/manifest+json application/rss+xml application/vnd.geo+json application/vnd.ms-fontobject application/wasm application/x-font-ttf application/x-web-app-manifest+json application/xhtml+xml application/xml font/opentype image/bmp image/svg+xml image/x-icon text/cache-manifest text/css text/plain text/vcard text/vnd.rim.location.xloc text/vtt text/x-component text/x-cross-domain-policy;

  location /.well-known/carddav {
    return 301 $scheme://example.com/remote.php/dav;
  }

  location /.well-known/caldav {
      return 301 $scheme://example.com/remote.php/dav;
  }

	location / {
		proxy_pass http://app;
		proxy_set_header X-Forwarded-For   $proxy_add_x_forwarded_for;
  }
}
We restart our reverse-proxy one last time
sudo docker compose restart openresty
Tests #
Manual Blocking #
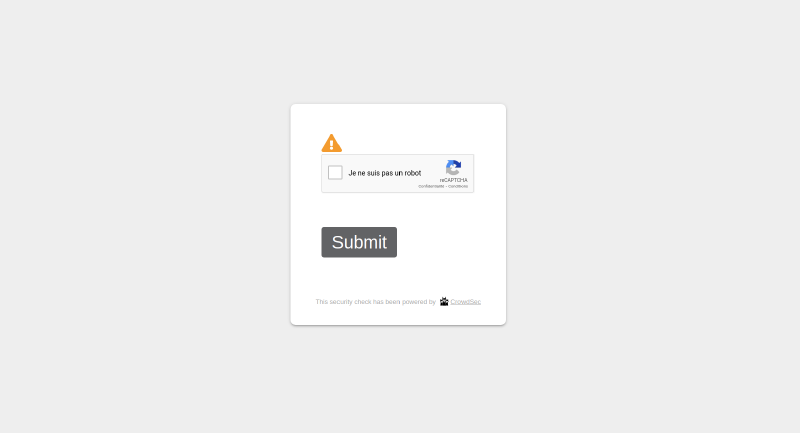
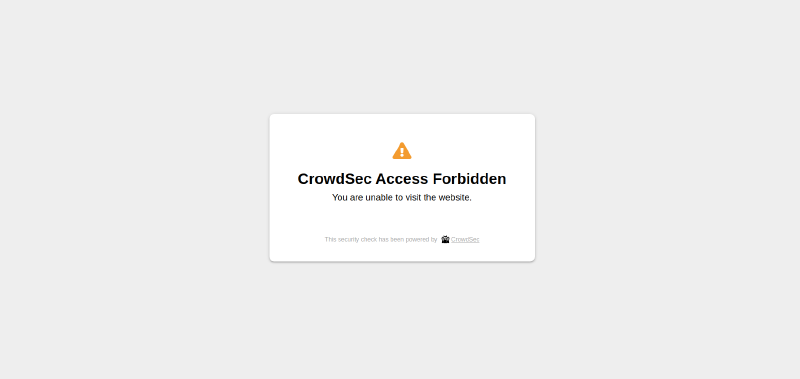
We can then test manual blocking with CrowdSec by adding a ban or captcha rule.
sudo docker exec -it nextcloud-crowdsec-1 /bin/bash
cscli decisions add --ip <ip> --duration 1m --type <captcha/ban>
exit
Result of the captcha blockage
Result of the ban blockage
Automatic Detection #
For automatic detection, we will try to enumerate 5 different users. As soon as the 5th attempt is detected, our enumeration attempt is immediately blocked by a blocking decision.

Conclusion #
Thus, our Nextcloud instance is now available by visiting our domain name. It is protected by the CrowdSec network and automatically blocks intrusion attempts.
Please note, the SSL certificates expire every 3 months, here is the procedure to renew them.
sudo docker compose run --rm certbot renew
Sources #
Some resources that helped me write this article.